Will this be the loudest ukulele in the world?
Those of you who subscribe to the newsletter had the opportunity recently to order a Session King uke.

How come I’m making ukes?
Well, following our recent move to Australia, I’m still waiting for most of my tools, molds and machines to arrive from the UK. And most my timber. So rather than twiddle my thumbs for two months I thought it an ideal time to make a batch ok ukuleles. I get asked to make them from time to time and always say “no.” I just don’t have the time. But now, I do.
Here is the first lot – most the tops of cedrela and some are sinker redwood. The backs and sides are all khaya mahogany. The necks will be vintage Australia red cedar – I picked up a 40-year-old board from a dealer. Gorgeous stuff.

Some of the ukes have normal necks, some have long, some will be tuned like ukes, some will be tuned like mandolins.
Now – if you are on my regular waiting list – don’t fret (pun intended) the waiting times have not changed – I factored this shift into the time quoted, so waiting times remain the same. Unless you’re one of the lucky ones who ordered a uke from me – you should have it by Xmas.
The mailing list got first bite of the cherry, followed by the readers of Acoustic soundboard forum in the UK (I like that lot) now it’s your turn – I can always squeeze another one into the batch. Ukes are only little!
If you’d like one, go to my CONTACT page and drop me a line. I’m open to idea – there are so many possible variations on the uke/mando/Session King theme.
Once my stuff turns up from the UK, I won’t be making any more of these. This is a one off. This may be the only chance you ever get to own one of my instruments for this sort of price.
Nigel
I’ve decided to update this post from time to time, so you can see the progress.
October 31st 2018
Uke molds are done, back braces made.


A simple enough job normally, but without all my usual gear, it all takes a bit longer. But its nice to be working mainly by hand.
November 1st 2018
Laminating forms, and the first neck roughed out.
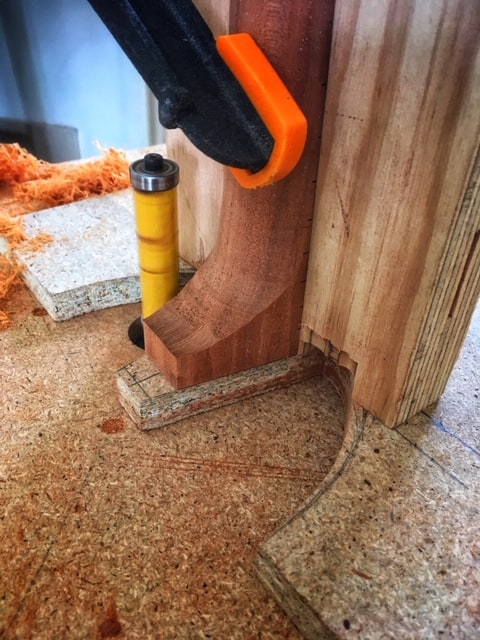
Session King sides are laminated – I’ve tried a number of materials to do this, all have their pros and cons – but essentially, I look to laminate sides in order to increase mass and stiffness. Why? The heavier the sides, the more the top works. Or rather – the less energy from the top “wicks” into the sides. Back in Germany, I used a vacuum pump for this job, but all that gear is still in Europe. So today I rigged up this little beast to clamp the layers together.

It has to be said – my jigs would never win a beauty contest. But I make my living making instruments, not tools. They might not be pretty, but they do the job.

This mold is the Martin style former. It’s a really lovely shape. I like it better than their guitar shapes. This is also (perhaps) your first glimpse of vintage Australian red cedar. This type of wood (it aint a cedar) grows all over SE Asia, and parts of Australia, but the younger trees tend to be rather pink. The old stuff (like this) is as rich as any mahogany I’ve ever seen. Stunning stuff. And lovely to work with.

November 2nd 2018
A few sides bent, first one in the lamination jig.
Didn’t get a great deal done today as half the day was spent doing household duties. But this afternoon I bent a few sides by hand then clamped the first one in the new laminating jig I made yesterday. All went remarkably well. I’ve used a number of different materials for adding mass and stiffness to Session King sides. This time I’m using wood. Spruce in the middle and balsa veneer on the inside. The balsa adds neither mass nor stiffness but it looks nice and clean.

Working this way I should be able to laminate one side in the morning, and another in the afternoon. So it’ll take a few days to laminate the whole lot, so I’ll get on with making tops and backs too.
November 7th 2018
Uke necks, bog oak fretboards

Not often I come across a “new” wood. New to me anyway. But this Aussie red cedar is truly lovely stuff. Cuts like cheese. No, it’s crisper than cheese. It reminds me of working with Cuban mahogany, but it is a lot lighter.
Below is a close up of two bog oak fretboards. I still have a load of ebony fret bards left, but I’m slowly moving over to alternatives – It’s only a matter of time before ebony is on the CITES list, so I’ve been looking at the options. This is one of my favourites. Bog oak is what it says on the tin – oak dug up from bogs. After a few hundred/thousand years it gets dug up. It’s found in the UK, Ireland, and the Ukraine. Other places also, I’d imagine. The result is a wood which is hard, dense, black, stiff, beautiful and a bit more stable than ebony. In a lot of ways, it’s superior. It just doesn’t have the name “ebony.” Once oiled, it’ll be indistinguishable from good ebony. Great stuff.
All my fretboards are cut on the CNC these days, including the radiusing – it must be a good 5 years ago or more that I developed a bad allergy to wood dust, so shipping these off to be handled by a robot not only makes them more accurate but has allowed me to keep working.

November 8th 2018
ukulele necks and fretboards
Didn’t get much time at the bench today – it’a been a bit of a chores day. Anyway – took back the heads, taped on a few fretboards and routed the fretboards to shape. Also bent and laminated more sides.


November 9th 2018
Necks and heels
Ah, working with the red cedar is great…the heels’ outline is cut on the drill press.


Then the head and neck are cut to thickness.

Then the waste material is used to make up the heel depth. This way the grain and colour match perfectly.

November 14th 2018
Backs


November 17th 2018
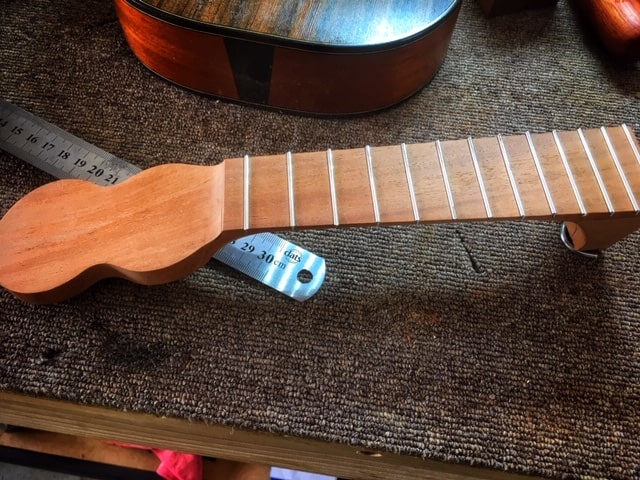
Uke necks carved, the first few nearly there…
One thing about woodwork – there are always many ways of doing the same thing. I was messing about on YouTube when I saw a great video of a chap carving ukulele necks on a metal working lathe. Very clever idea. But I don’t have a metal working lathe. But some friends nearby do have a woodworking lathe, so I called around to have a go.
Great! What a great way to carve necks. Truth is, I’ve not got the brains to learn how to program a CNC, but I do know how to cut wood up. Looks like I’m buying a lathe this week…


November 21st 2018
Applying the finish…

There are a number of options for finishing these ukes. They won’t be a high gloss, super shiny uke – if they were, they’d be a lot more expensive, and these are to date the most affordable instruments I’ve ever made. Whilst still in England, I asked Ralph Plumb, a violin making friend of mine to show me how he finished his work. Ralph made a number of samples for me, with different types of varnish, with different ways of applying them.
This is the first uke body in the drying cupboard. The initial sealer coat looks very promising. I’ll apply a thin fresh coat of finish daily, and in a week there’ll be enough finish to “cut it back” and apply a final top coat.
There are a couple more simple ukes like this one to do – the rest are all a bit more complicated, and I hope to get them bound and in the drying box by next week.
November 22nd 2018
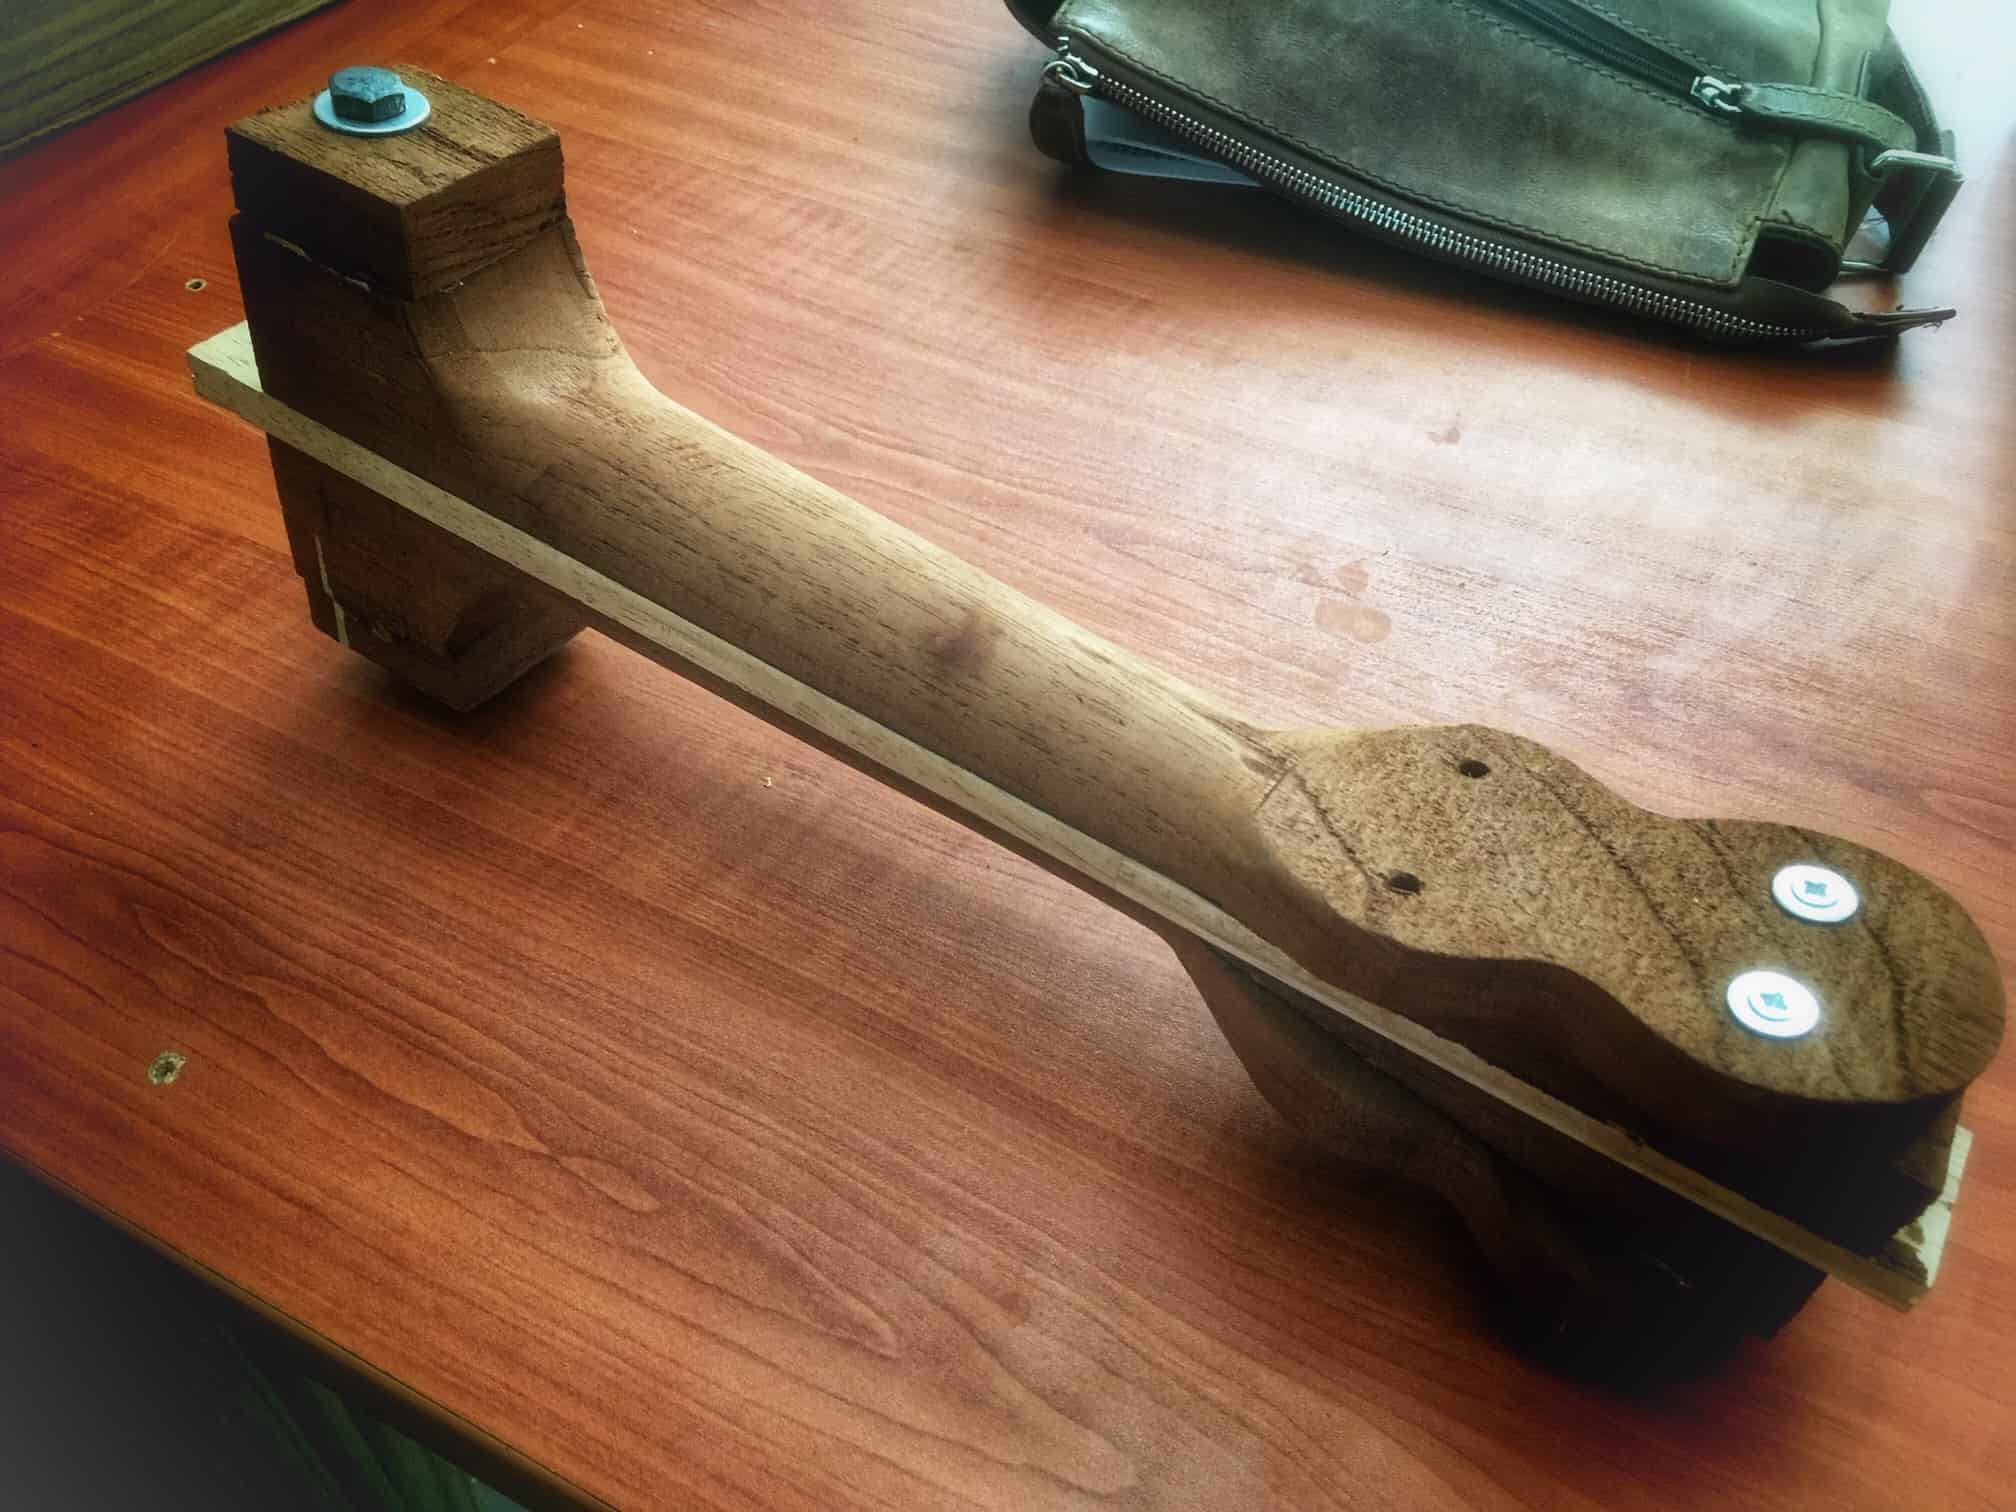
Applying the finish…and fretboard dots

The second coat of varnish went on in the morning and already the mahogany is becoming a lovely dark colour.
These days, I’m a bit wary of materials I once took for granted. Like white pearl fretboard dots. I’ve no idea if these things are banned or not, but I have heard of instruments being stopped because of what inlays are made from. So how about some nice shiny metal dots instead? I used them a lot last year, and they look smart. And I have to say, they come in very convenient packaging…


November 26th 2018
Binding the sinker redwood tops


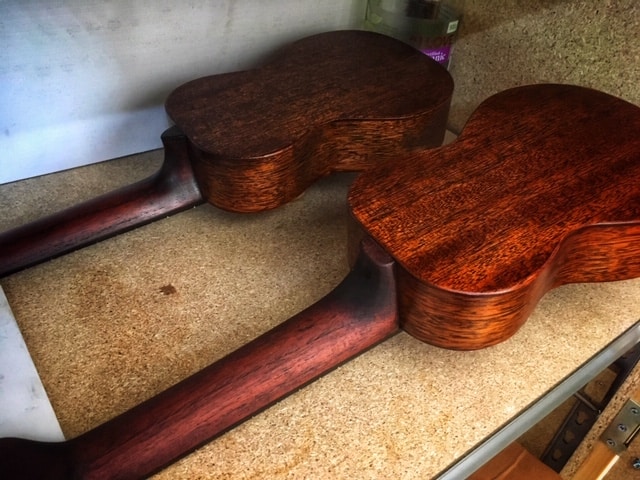
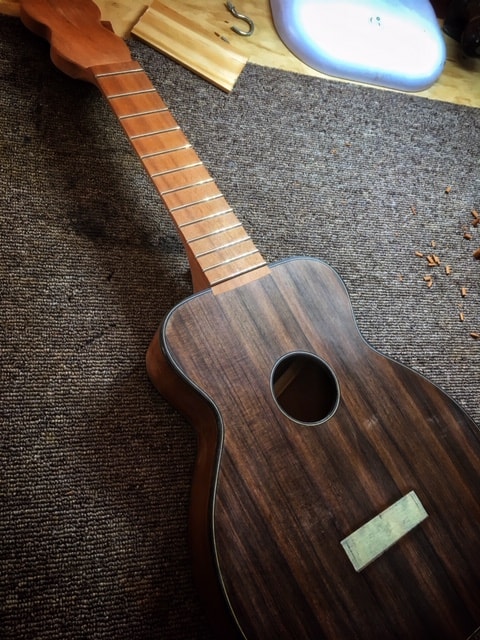
November 30th 2018
Sinker redwood tops, pomelle sapele back and sides


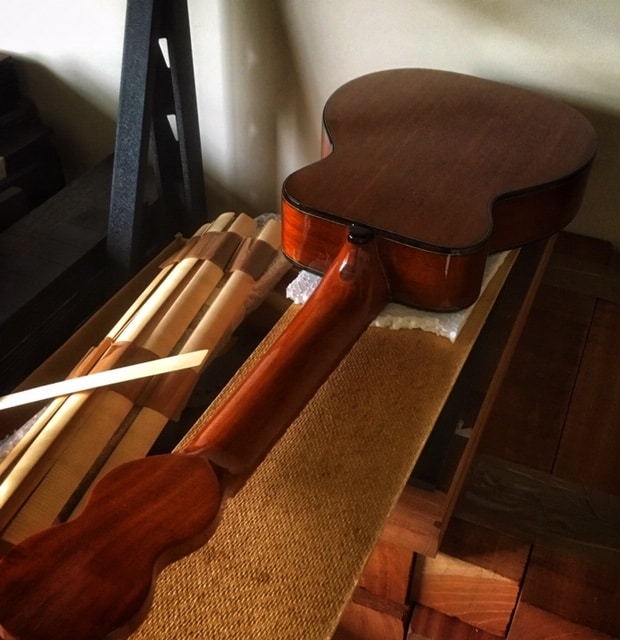
6/12/18
necks on, more varnishing…
7/12/18
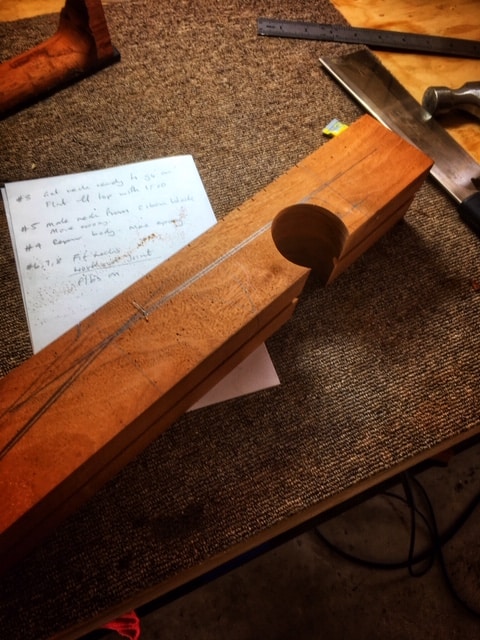
One piece Cuban mahogany neck
Start with a piece of reclaimed vintage Cuban mahogany. Dress it straight, flat and square.
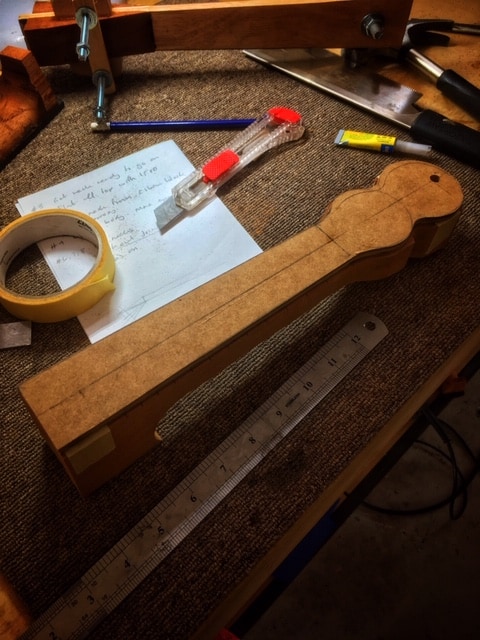
Glue a fretboard to one side, and using a square as a guide, slot the block by hand.


Start cutting away all the bits you don’t need…the heel.
Cut the outline, trim with a router.
Mount it on the lathe, along with another neck. Cut it round by hand.


Trim the heel to shape.
Press in the frets.
Sand, and attach to the body.
7/1/19
Well, it’s been a month since I last updated this post – the ukes are almost finished – I’ve been waiting for a few bits and pieces to arrive and now they have. The ukes are all in different stages of finishing, so they shouldn’t be too long now.
I’ve also been getting on with the next batch of Session King tenor guitars so they coming along nicely too.


UPDATE 8/4/19
No, I hadn’t forgotten about these – the finishing has been a much bigger pain in the bum than I anticipated. But, here is one of the steel string mando/ukes – and very nice it is too.
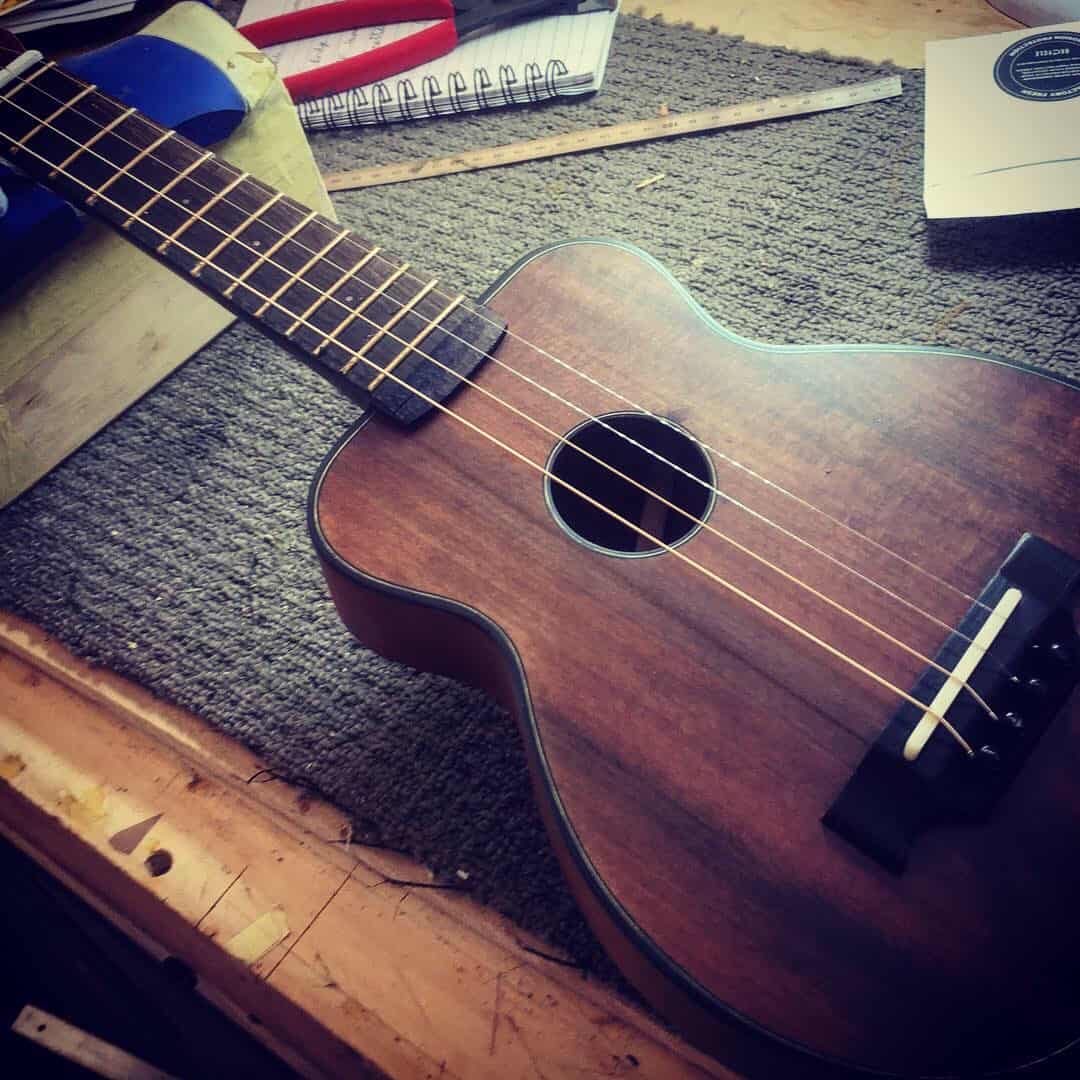
More soon!